Hubot, Slack and Azure deployments - Part 1
I’m aiming at doing this a multipart series (this being the first part). I will update this intro with links to the follow up posts as I publish them.
Intro
We just pulled off our first hackday with the tech-team at acast. I set out to get GitHub’s open source robot Hubot to integrate with our Slack chat (a guerrilla warfare move on my part to move us from HipChat to Slack :), next I’ll tackle the tabs vs spaces issue). This post is a step by step account for how I did it.
The Goal
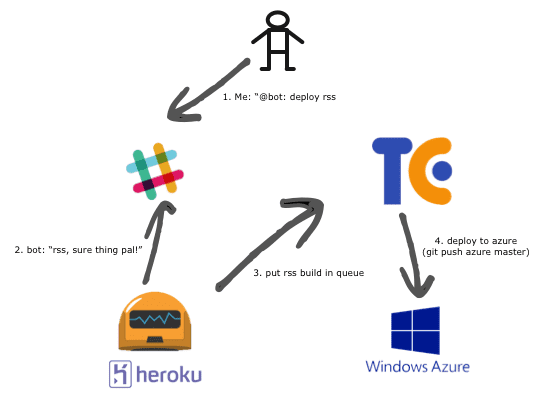
Deploy our projects to azure from the chat tool to:
1. Lower the barrier of deployment
2. Increase transparency and to use the chat as a information radiator (”Niklas is now deploying the rss-service”)
Doin’ it
Enabled Hubot integration in Slack
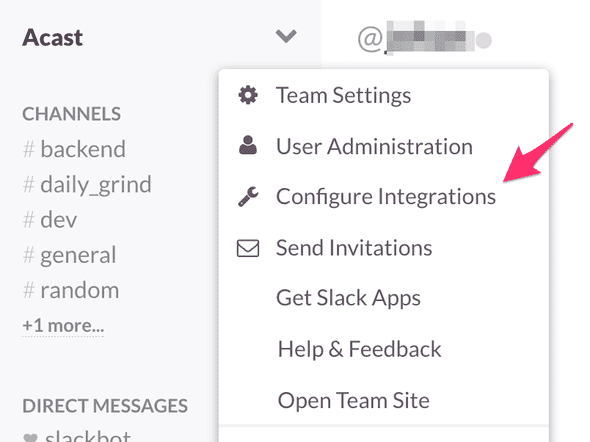
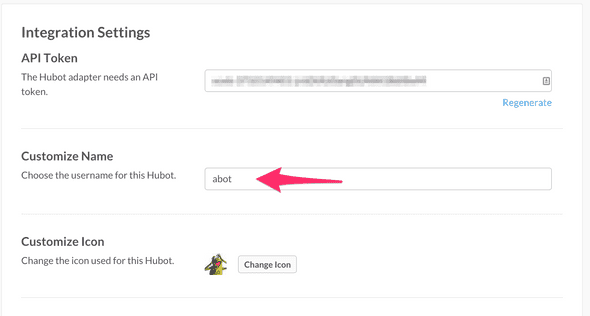
I logged into slack.com, went to *Configure Integrations* and enabled Hubot, giving the hubot user name, in our case abot.
Getting an instance of Hubot up and running
Now Slack is ready and we need an instance of Hubot running to do our biddings. I chose to put it on Heroku because of the simplicity and the good tutorials. I will be looking at setting it up on Azure WebSites later on.
In broad strokes I followed the Getting started with Hubot tutorial.
First let’s get our local environment in order (Caveat: I did this on Mac OS X and I haven’t tested it on Windows yet). Start by installing yeoman and a hubot generator.
| $ npm install -g yo generator-hubot | |
| $ mkdir aBot && cd aBot | |
| $ yo hubot |
slack as adapter. I don’t think that matter in this stage. It can be configured in the Procfile (see further down in this post). But we still needed to install the adapter for slack to test it later on:
| $ npm install —save hubot-slack |
If *node\_modules* is not entered in the .gitignore file, it can be wise to add it. Now we’re ready for our first commit:
| $ git init | |
| $ git add . | |
| $ git commit -m “Initial Commit” |
If you want to you can start a local redis for dev purposes. I don’t think that is needed. Let’s try if we’ve done everything correctly. Kick it off locally.
| $ bin/hubot | |
| Hubot> Hubot help | |
| Hubot adapter - Reply with the adapter | |
| Hubot animate me <query> - The same thing as `image me`, except adds a few parameters to try to return an animated GIF instead. | |
| Hubot echo <text> - Reply back with <text> | |
| Hubot help - Displays all of the help commands that Hubot knows about. | |
| Hubot help <query> - Displays all help commands that match <query>. | |
| Hubot image me <query> - The Original. Queries Google Images for <query> and returns a random top result. | |
| Hubot map me <query> - Returns a map view of the area returned by `query`. | |
| Hubot mustache me <query> - Searches Google Images for the specified query and mustaches it. | |
| Hubot mustache me <url> - Adds a mustache to the specified URL. | |
| Hubot ping - Reply with pong | |
| Hubot pug bomb N - get N pugs | |
| Hubot pug me - Receive a pug | |
| Hubot the rules - Make sure Hubot still knows the rules. | |
| Hubot time - Reply with current time | |
| Hubot translate me <phrase> - Searches for a translation for the <phrase> and then prints that bad boy out. | |
| Hubot translate me from <source> into <target> <phrase> - Translates <phrase> from <source> into <target>. Both <source> and <target> are optional | |
| Hubot youtube me <query> - Searches YouTube for the query and returns the video embed link. | |
| ship it - Display a motivation squirrel | |
| Hubot> hubot adapter | |
| shell |
To the Cloud
So we’re running locally. Nice! Now let’s see if we can push it up to Heroku.
First up we need to crete a Heroku app. You need Heroku Toolbelt installed and a account on Heroku to do this. Let’s get cracking creating the app:
Log in first:
| $ heroku login | |
| Enter your Heroku credentials. | |
| Email: niklas@hardcoded.se | |
| Password (typing will be hidden): | |
| Authentication successful. | |
| updating...done. Updated to 3.26.0 |
Next up, create the app. The –region parameter is not needed. If we don’t enter it we end up in the US which isn’t what I wanted :). The commands below also renames the site after creating it, not necessary.
| $ heroku create --region eu | |
| Creating gentle-sands-946h7... done, region is eu | |
| https://gentle-sands-9467.herokuapp.com/ | https://git.heroku.com/gentle-sands-9467.git | |
| Git remote heroku added | |
| $ heroku apps:rename acastbot |
Alright, we got a repo and we got an app. Now we need to push up some configuration to the app before pushing up the code. Since we’re using the slack adapter in this post we need to add config for it. This is documenteed in the Slackbot on Heroku article. In the code below, replace the value of the HUBOTSLACKTOKEN with the token we got when enabling the Slack integration on Slack.com.
| $ heroku config:add HEROKU_URL=https://botname.herokuapp.com | |
| $ heroku config:add HUBOT_SLACK_TOKEN=xoxb-1234-5678-12345-12345 |
For Hubot to persist it needs a brain. It’s bra`instance. We need to add it if we want persistence. I opted for the Heroku Redis addon Redistogo (it’s free in the nano version).
| $ heroic add ons:add redistogo:nano | |
| Adding redistogo:nano on acastbot... done, v7 (free) | |
| Use `heroku addons:docs redistogo` to view documentation. |
One last thing before we’re ready to give it a spin. Heroku work using a file called a Procfile which defines how it should start the app pushed to it. We just need to make sure it looks good. Should look something like this:
| web: bin/hubot --adapter slack --name botname |
Where “botname” should be same as entered in the slack integration.
Now, let’s see if it flyes:
| $ git push heroku master |
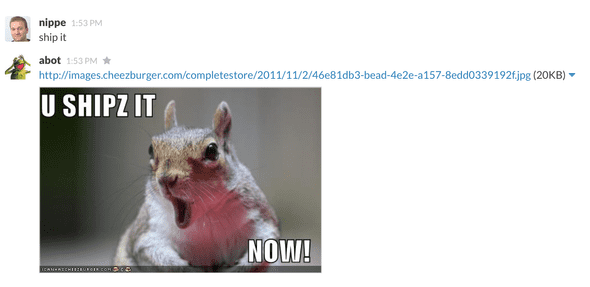
It works! For me it did anyway. I waited a little while with my eyes pealed at my Slack client and loe and behold if the user abot (in my case) got a green dot next to it. We can the spark up a private chat with it and say “help” or “ship it” or other extremely useful stuff.
So first part done! In the next post we’ll look at how to trigger TeamCity builds from the chat.
Tags: azure devops, development, devops, node.js, prodctivity


