Water level notifier - home IoT, sending text messages using a Particle Photon
(This is also posted at medium: https://medium.com/@nippe/water-level-notifier-home-iot-sending-text-messages-using-a-particle-photon-f5cdd74efb9b#.ihyk18myl as a little A/B-test :)).
So, I’ve been itching to do a little IoT project at home. Last thing I did was the a little “information radiator” telling us how long before the bus leaves (here). Now I wanted to do something else fun and useful.
So in the basement of our house we have a geothermal heating pump. When water gets warm and expands inside the pump it has to dispose of it. We don’t have a floor drain in that part of the cellar so it ejects the water into a jar. When it’s full I’ll empty it and put it back.
In order for me not to have to check if it’s full with regular intervals I put together the following solution. When the water level reaches a certain threshold I should get a text message telling me that it’s time.
Parts used
Parts needed
1 Particle Photon microcontroller – An arduinoish microcontroller with wifi on the chip and some neat cloud services around it that you can use if you want to (https://www.particle.io/manage), I think they made my solution a bit easier so I used their cloud. I hade one laying around at home.
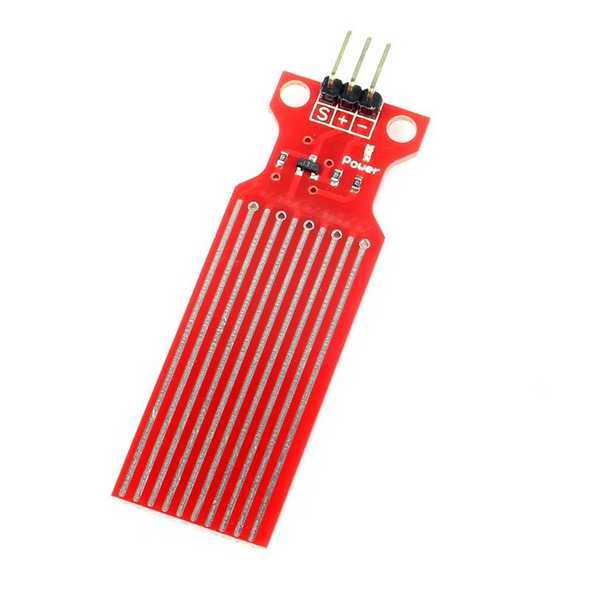
1 Water sensor for arduino – Cheap simple thing that returns different voltage depending on water level.
1 particle.io account – for setting up webhooks
Particle CLI tool — using it to register webhooks and get data from the device. So you probably can get on without it but I’ll use it in this article.
Module cable with 4 conductors- You can use any cable, I had that laying around from erlier projects.
Soldering gear – you probably can make it work without using clamps or lab jumper cables.
Parts not needed but used
Experiment board – You can use a breadboard or just solder wires to pins and other wires.
PBC Connector – again you could just solder it on to pins.
Shrink tubes – I used to secure som of my amateurish soldering.
Zip tie – just to hold some stuff together
Building the hardware
I actually proofed the concept out using an Arduino Uno, a breadboard and some jumper cables. But when I set of to make the “real stuff” I started with soldering the connectors of the cable to the water sensor. Keep track of the colors! I used red for power, black for ground and green for signal (signal delivers different voltage depending on the water level). Then I put on some shrink plastic to secure the soldering.
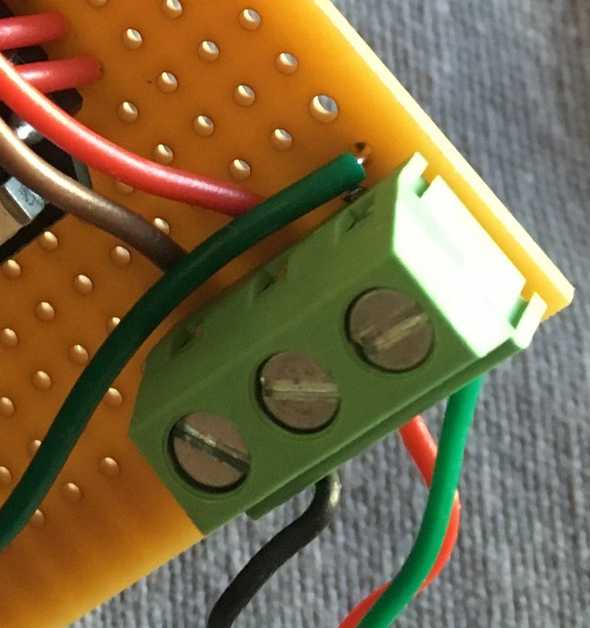
I decided to put a PBC connector on a prototypeing circuit board so that I simply can change the length or type of wire used for the water level sensor.
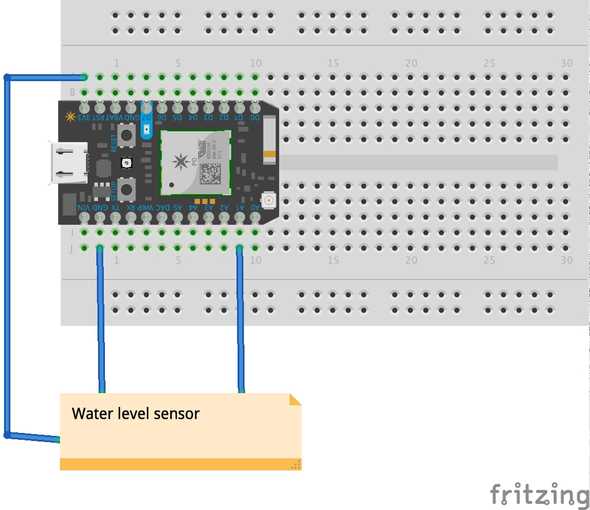
So to clarify the layout:
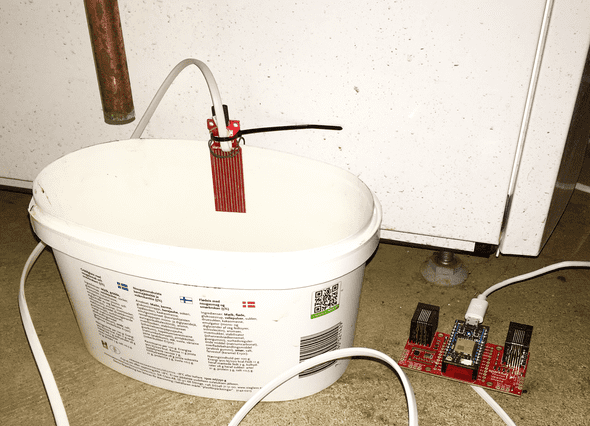
This is my first, crude, prototype looked.
I made it look a little bit more polished.
Software
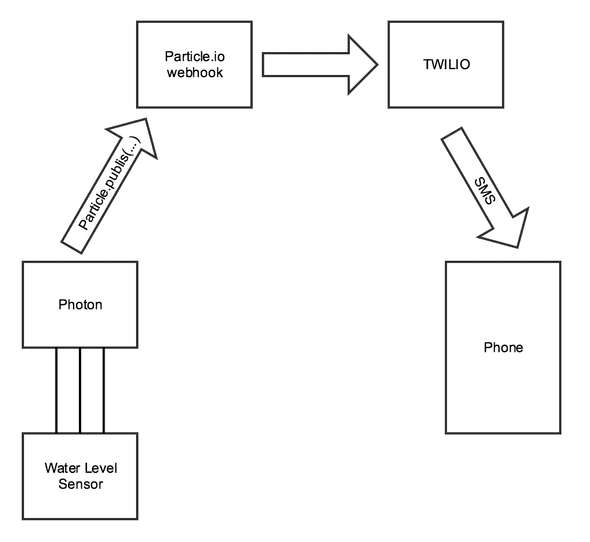
So there is a few parts in this solution. Since particle.io has cloud services working with their devices and SDK available at particle.io. I opted to use that instead of doing HTTP calls directly from the Particle Photon to Twilio to get it done faster. Here’s an overview of the solution.
Setting up Twilio
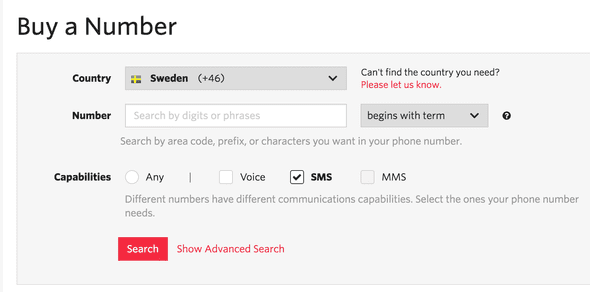
First of all you need to set up a twilio account at https://www.twilio.com/. When you’re logged in you need to deposit some money to be able to use Twilio. Then you need to accuire a phone number enabled for SMS
You need your twilio number, accountd sid and auth token.
Creating the Webhook
Now we’re going to put the Twilio info to use when we are going to create a webhook in our Particle.io account. A particle webhook is a cloud service that acts as a bridge between your particle and the rest of the world. The Particle SDK provides nice utility abstractions for these. So all you have to do in your code (as we’ll see later on) is to call Particle.publish(“webhook-name”, “message”, 60, PRIVATE); Which is kinda neat.
The webhook file is pretty straight.
| { | |
| “eventName”: “twilio”, | |
| “url”: “https://api.twilio.com/2010-04-01/Accounts//Messages", | |
| “requestType”: “POST”, | |
| “auth”: { | |
| “username”: “”, | |
| “password”: “” | |
| }, | |
| “form”: { | |
| “From” : “”, | |
| “To” : “”, | |
| “Body” : “{{SPARK_EVENT_VALUE}}” | |
| }, | |
| “mydevices”: true | |
| } |
Create a file named twilio-webhook.json like this.
| $ particle webhook create twilio-hook.json | |
| Using settings from the file twilio-hook.json | |
| Sending webhook request { uri: ‘/v1/webhooks’, | |
| method: ‘POST’, | |
| json: | |
| { event: ‘twilio’, | |
| url: ‘https://api.twilio.com/2010-04-01/Accounts//Messages', | |
| deviceid: undefined, | |
| requestType: ‘POST’, | |
| mydevices: true, | |
| eventName: ‘twilio’, | |
| auth: | |
| { username: ‘’, | |
| password: ‘’ }, | |
| form: | |
| { From: ‘’, | |
| To: ‘’, | |
| Body: ‘{{SPARK_EVENT_VALUE}}’ } }, | |
| headers: { Authorization: ‘Bearer 7d90b34725afede88ce0b6ec824712121212121212’ } } | |
| Successfully created webhook with ID 573069bd3f3354c212121 |
Now we have everything setup and need some code to get it running :). All code is available at https://github.com/nippe/waterlevel-notifier-particleio/tree/blogpost.
Code on the device
First off I declare some variables and a method.
| int sendSms(String command); | |
| const int DELAY_IN_SECONDS = 10*60; // 10 minutes | |
| bool isMessageSent = false; | |
| int waterThreshold = 2880; | |
| int waterLevelPin = A1; | |
| int waterLevel = 0; |
DELAYINSECONDS is how often to check the water level. sendSms is the method that calls the webhook, waterLevelPin defines which analog port I connected the water level sensor to and some values for water level and keeping track of text message status. Next the up, the setup:
| void setup() { | |
| Particle.variable(“waterLevel”, waterLevel); | |
| Particle.function(“sendSms”, sendSms); | |
| pinMode(waterLevelPin, INPUT); | |
| delay(1000); | |
| } |
Using Particle.variable and Particle.function to expose a variable and a method to the Particle cloud service, for testing purposes. Setting the mode of the water level pin to input using pinMode(..).
| void loop() { | |
| getWaterLevel(); | |
| checkWaterLevel(); | |
| delay(DELAY_IN_SECONDS * 1000); | |
| } | |
| int getWaterLevel() { | |
| waterLevel = analogRead(waterLevelPin); | |
| return waterLevel; | |
| } | |
| int sendSms(String command) { | |
| if(command.length() > 0){ | |
| Particle.publish("twilio", command, 60, PRIVATE); | |
| } | |
| return 0; | |
| } | |
| void checkWaterLevel() { | |
| int currentLevel = analogRead(waterLevelPin); | |
| if(currentLevel > waterThreshold) { | |
| if(!isMessageSent){ | |
| char msg[255]; | |
| snprintf(msg, sizeof(msg), "Dags att tömma vatten i källarn! Nivå: %d", waterLevel); | |
| sendSms(msg); | |
| isMessageSent = true; | |
| } | |
| } | |
| if(isMessageSent && (currentLevel < waterThreshold)) { | |
| isMessageSent = false; | |
| sendSms("Du har tömt ser jag, lysande polarn!"); | |
| } | |
| } |
A larger chunk of code this time. getWaterLevel() gets the value and puts it in a global variable just so I can monitor it through the particle cli. checkWaterLevel() does the actual checking and sends a SMS if the current value is higher than the threshold and no message has been sent.
So no rocket science but a fun little project.
Then I ended up tweaking it a little adding a few LEDs and stuff just for fun.
Tags: arduino, IoT, particle.io
